[Webike Channel] Yoshimura PRO-GRESS2 Multi temp meter
- 19/03/2018
121 views
![23119306 2 - [Webike Channel] Yoshimura PRO-GRESS2 Multi temp meter](https://gc-img.webike.net/@wid-news/wp-content/uploads/2018/03/23119306_2.jpg)
Hi everyone, this is Kusuyama of Webike.
Today, I am going to introduce “YOSHIMURA PROGRESS 2 Multi temp meter” and it’s installation tip.
As you all know, management of motorcycle water temperature and oil temperature is very important.
This item can display 4 channcel. Clock, voltage, and temperature of two places like water temp and oil temp (Need a temperature sensor separately)
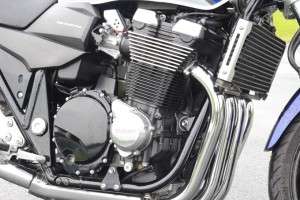
I am going to try installing it on CB1100 with this exclusive bracket to monitor oil temperature.
So, let’s install.
![419-P02-0100_1 419 P02 0100 1 - [Webike Channel] Yoshimura PRO-GRESS2 Multi temp meter](https://japan.webike.net/moto_news/wp-content/uploads/2018/03/419-P02-0100_1.jpg)
The point to this installation is the connection between the power supply and oil temperature sensor.
First remove the seat and tank.
Since I am going to monitor oil temperature, I have connected Oil temp sensor using the extenion cable.
There are another cable sticking out from the meter to measure another temperature, but I am not going to use this today.
The power cable is connected to the body earth and the accessory power supply. I am going to use optional carbon meter bracket to place it right at where I want it to be.
Now the seat and the tank has been taken off, I am going to connect the cables.
I am going to use one of the handle clamp to install optional meter bracket.
Meter is now set to where I want it to be and I am going connect it to power supply. Now, as you are finding the best route for the cable, make sure that the cables won’t be too tight or loose even when you fully turning the handle.
This CB1100 here happen to have USB power supply installed already so I am going to split from there to secure electricity.
The point is to connect to cable where you have the power to the meter as you turn your key on.
I lead negative to body earth.
Let’s make sure I have the power to the meter as I turn the key on.
Next, the installation of the temperature sensor.
Try to have sensor cable trace the stock cable as much as possible down to drain bolt as this would probably the safest route.
The temp sensor will replace the stock drain bolt.
Let’s set this up.
![6b071eae59b684e3f1a256ce98766532L 6b071eae59b684e3f1a256ce98766532L - [Webike Channel] Yoshimura PRO-GRESS2 Multi temp meter](https://japan.webike.net/moto_news/wp-content/uploads/2018/03/6b071eae59b684e3f1a256ce98766532L.jpg)
Press and hold the mode button and set button at the same time to activate “setting mode”
You press “set” button while “1” is blinking and press “mode” to change between Celsius and Fahrenheit.
You press “set” button while “2” is blinking and press “mode” to change the tempurature of warning sign.
You can set it between 80℃ and 150℃.
Warning will be indicated by the flashing of a temperature.
You press “set” button while “3” is blinking and press “mode” to change the tempurature of warning sign of second sensor
You press “set” button while “4” is blinking and press “mode” to change brightness of backlight.
You press “set” button while “5” is blinking and press “mode” to adjust clock.
Press and hold the mode button to exit frome setting mode.
I am done installing YOSHIMURA’s PRO-GRESS2 Temp meter.
As I said at the beginning, you can monitor time, voltage and 2 temp.
![ypg2_00b_bk ypg2 00b bk - [Webike Channel] Yoshimura PRO-GRESS2 Multi temp meter](https://japan.webike.net/moto_news/wp-content/uploads/2018/03/ypg2_00b_bk.jpg)
Voltage indication helps you monitor if your vehicle is running under enough voltage especially when you are equipped with other electricity devices or long absent from last ride
Althogh there are many models now that originally equipped with clock, but it would be nice to know the time while you are on touring or commuting.
Yoshimura PRO-GRESS2 Multi temp meter, highly recommend it!
■You can shop from below URL.
![23119306_2 23119306 2 - [Webike Channel] Yoshimura PRO-GRESS2 Multi temp meter](https://japan.webike.net/moto_news/wp-content/uploads/2018/03/23119306_2.jpg)
https://japan.webike.net/ps/PRO-GRESS2/#!search&p.k=PRO-GRESS2
Related post


![Koleksi Smartphone Holder Webike Indonesia smartphone holder webike indonesia 150x112 - [Edisi Terbaru 2019] 5 Rekomendasi Smartphone Holder dari Webike!](https://gc-img.webike.net/@wid-news/wp-content/uploads/2019/07/smartphone-holder-webike-indonesia-150x112.jpg)

Top Ranking Views
-
 Wajib Tahu! Inilah Perbedaan Sparepart OEM, Aftermarket dan KW Alias Palsu
 - Tips Mengganti Seal Oli Shock Depan Langsung dari Ahlinya!
- Mesin 1, 2, 3, 4, dan 6 Silinder: Apa Saja Keunggulan dan Kekurangannya?
- Tips Menghilangkan Bunyi Decit Pada Rem Langsung dari Mekanik Profesional
- 50 Shades of Fake: Bagaimana Membedakan Brembo Asli Dengan Palsu?
- 10 Ide Modifikasi Yamaha XSR 155 2020, Kamu Harus Tahu! Lengkap, Rekomendasi Sparepart & Perbandingan Harga
- 5 Alasan Brembo Jadi Pilihan Brand-Brand Motor Terbaik di Dunia
- 5 Motor Lawas Terpopuler di Indonesia (I)
- Honda CBR400RR Street Sport 4 Silinder Bakal Hadir Kembali?
- Arti Kode Busi & Perbedaan NGK BR8ES 5422 vs 3961